The project is now officially done, meaning that this blog will (most likely) receive no further updates. Rather than make a bunch of posts about what I did since my last update, I'm simply going to refer readers to the website with the project write-up:
Artists' Paint Mixing Simulation
The results section is probably the most interesting for the casual observer.
Thursday, April 30, 2009
Saturday, April 25, 2009
Changing Primaries
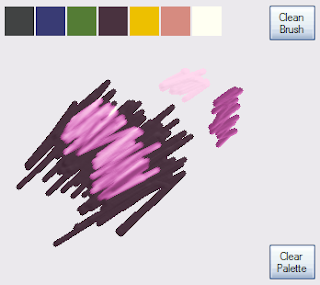
I've added the ability to change the primaries that are displayed on the mixing palette. This doesn't change the results of colour mixing, but is more a usability feature to allow a user to customize the "quickly available" colours for use in mixing, ie, the colours they consider to be their primaries.
The image shows the mixing area with a different set of primaries than those used in other screen shots.
 (For comparison, here are the colours used as primaries in the other screen shots:)

The image shows the mixing area with a different set of primaries than those used in other screen shots.
 (For comparison, here are the colours used as primaries in the other screen shots:)
A Mixing Example
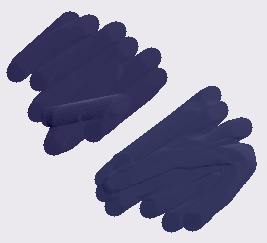
As an example of the simulated paint mixing, consider the image below which shows two paints: phthalo blue (green shade) in the upper left and phthalo green (blue shade) in the lower right.

The base colour of the two paints is very similar with the one in the lower right being ever so slightly lighter in appearance to the one in the upper right.
However, watch what happens when we mix in some titanium white:
 The phthalo blue turns a lighter blue colour while the phthalo green becomes a lighter greenish-blue.

The base colour of the two paints is very similar with the one in the lower right being ever so slightly lighter in appearance to the one in the upper right.
However, watch what happens when we mix in some titanium white:
 The phthalo blue turns a lighter blue colour while the phthalo green becomes a lighter greenish-blue.
Full Palette
I've finished converting the paint data from [Okumura] (see the post on references) into a usable form. It covers measurements of 27 acrylic paints. I allow for a maximum of 8 to be displayed in the palette mixing area for use as primaries, with the full set accessible from an additional colour palette, pictured below.


Brushing
 I've made some updates to accomodate different brush sizes and shapes, which wasn't hard as I'd planned ahead for it, mostly just some standard UI work to allow for brush editing. I think that the large brush sizes really show off the paint-like feel of things much better than the small brush sizes.
Brush shapes can also be modified (the screen shot only shows a circular brush) using predefined shapes or allowing customized ones. The brush editor isn't shown since it's not terribly interesting to look at.
Wednesday, April 22, 2009
New Palette
 I've updated the palette and colour mixing area. It is also now using OpenGL for rendering, but more importantly, the sliders have been removed in favour of a colour mixing area that works similar to the canvas. The primaries are now shown along the top.
Still need some more work in this area, most notably the ability to save mixed colours and some additional brush options, which are next up on the list of things to do.
Rendering Erratta
 I've been incorporating some tweaks to rendering. In addition to switching to OpenGL for rendering, I've added some embossing effects to give the paint the appearance of depth (though it's sort of a "fake" lighting effect and isn't really based on colour per se), and I've also added a bit more of paint fluid simulation (though simplified) with advection - that is, wet paint being moved around slightly when painting over top of it.
The advection can be hard to see, but looking at parts of the purple line(s) that have been painted over you can see that the purple paint has been smeared a little - probably most visible in this example looking at the white paint in the lower left and the yellow in the upper left.
I've also turned off the specular highlights on the canvas background (though it's still applied to the paint).
Subscribe to:
Posts (Atom)